Images and videos
Images


Dupuytren contracture
Preoperative view of the ring finger of a patient with a flexion contracture with surgical indications, showing the incision marking, demonstrating a transverse incision overlying the distal palmar crease, and oblique Brunner incisions coursing from it proximally and distally
From the collection of Dr C.M. Rodner; used with permission
See this image in context in the following section/s:

Dupuytren contracture
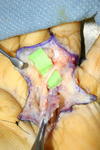
Intraoperative view of the ring finger of a patient with a flexion contracture, with the radial digital neurovascular bundle identified and isolated coursing volar over the Dupuytren cord, which is being held up by forceps as it is excised in a proximal-to-distal direction
From the collection of Dr C.M. Rodner; used with permission
See this image in context in the following section/s:

Dupuytren contracture
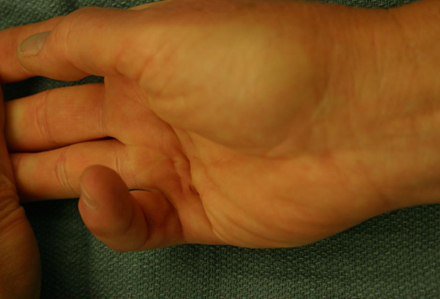
One-month postoperative view of the ring finger of a patient with a flexion contracture, demonstrating full active digital extension
From the collection of Dr C.M. Rodner; used with permission
See this image in context in the following section/s:
Dupuytren contracture
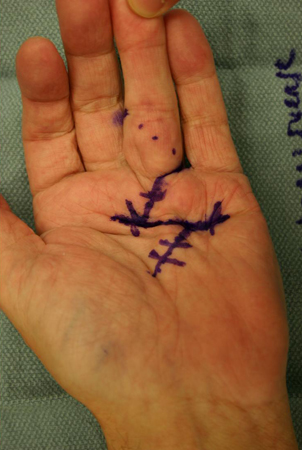
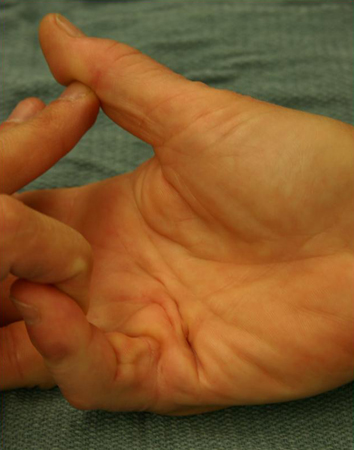
Preoperative view of a small finger flexion contracture with surgical indications
From the collection of Dr C.M. Rodner; used with permission
See this image in context in the following section/s:
Dupuytren contracture
Preoperative view of a small finger flexion contracture with surgical indications
From the collection of Dr C.M. Rodner; used with permission
See this image in context in the following section/s:

Dupuytren contracture
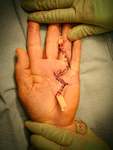
Postoperative view of the ring finger of a patient with a flexion contracture, showing the closed wound over a Penrose drain, which is used to minimize subsequent hematoma formation
From the collection of Dr C.M. Rodner; used with permission
See this image in context in the following section/s:
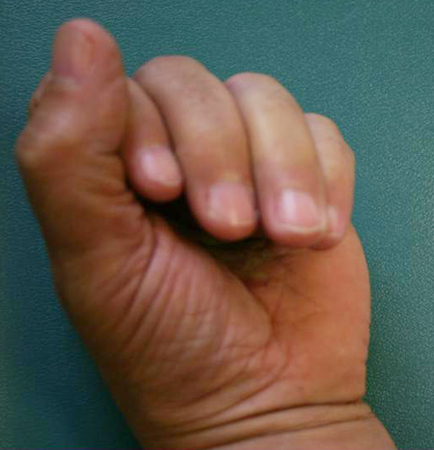
Dupuytren contracture
One-month postoperative view of the ring finger of a patient with a flexion contracture, demonstrating active digital flexion
From the collection of Dr C.M. Rodner; used with permission
See this image in context in the following section/s:
Use of this content is subject to our disclaimer